
Being a smartphone user, anyone has various thoughts in mind regarding the functionality of their handset, as new features and updates are released every day. But while managing applications with your device, users need to be clear on many more aspects so that they are not stuck at one point or if they facing a problem then they have something to refer to.
Now in this guide, we will bring steps to recognise and resolve this problem.
Now to make our users more clearly regarding Application settings in each and every step of the Samsung smartphone. Therefore, in this article, we going to cover tips and tricks of Samsung smartphones related to their Application setting. To make our users most of this post, we define the things further into sub-steps under the following heads:
-
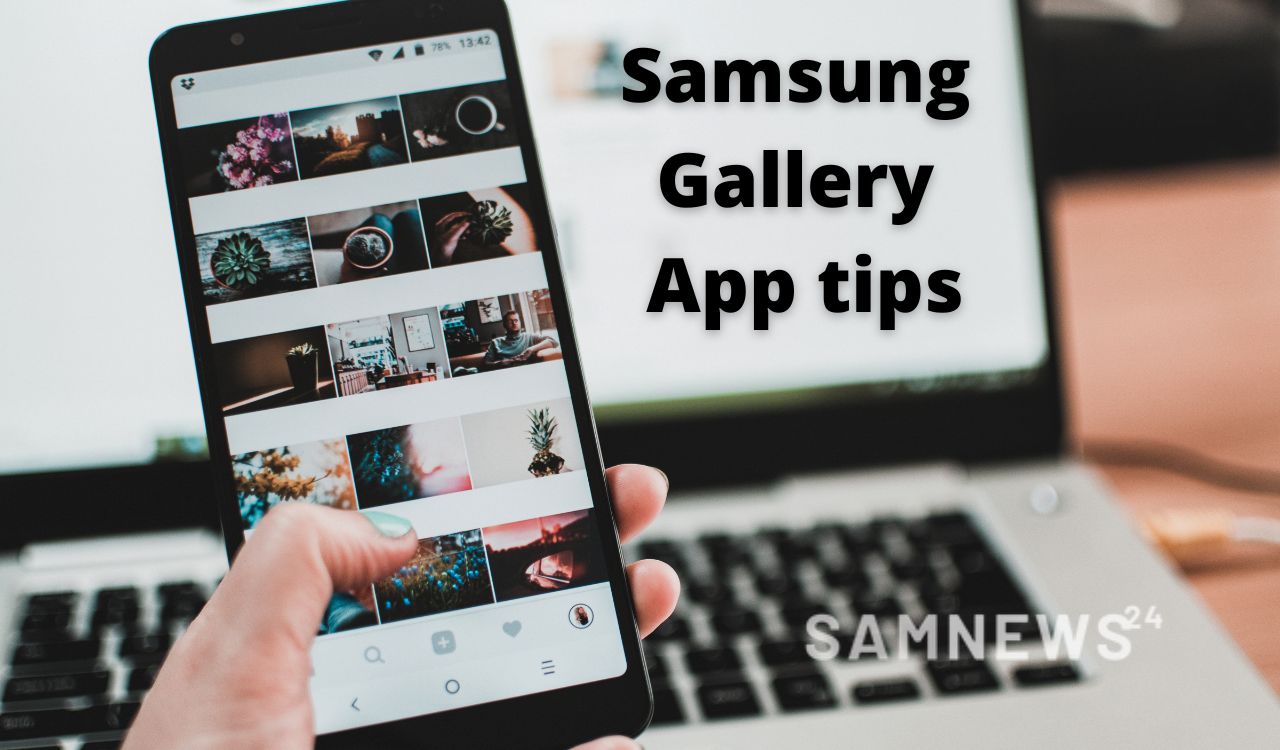
Steps to manage photos and videos in the Gallery app by synchronizing them with OneDrive.
-
How to update Play Store and Galaxy Store apps on your Galaxy phone.
-
How to know that my mobile device is compatible with Disney Plus?
-
What should I do when an application closes automatically as soon as I start it.
-
Steps to use the Calendar app on a Samsung smartphone.
-
Steps to connect your Galaxy smartphone to a car using Android Auto.
-
How to protect your Galaxy phone from installing smishing, pharming, and spy apps.
-
Steps to use the TalkBack feature.
-
I cannot get 100GB of bonus storage through the OneDrive app.
-
Picture resolution taken built-in Instagram mode on the camera is low and fixed.
-
What is a secure folder and how to use it?
-
Why do apps close unexpectedly?
-
Steps to control media and devices on your Galaxy smartphone.
-
How to customize apps on your Samsung Galaxy Watch Active2.
-
How to fix apps that keep crashing and freezing.
-
How to remove lock screen ads.
-
Steps to troubleshoot Google Play Store download.
-
How to use the Samsung Members app.
Now, follow the below steps in order to understand each of these tips & tricks. I would recommend that, before proceeding with the below steps, be sure that all devices’ software and related apps are updated to their latest version.
Steps to manage photos and videos in the Gallery app by synchronizing them with OneDrive
OneDrive brings you the feasibility to store and save all your pictures and videos using this cloud service on your Galaxy phone. All you need to do is a setting by which OneDrive and Gallery sync automatically, Now with this, you can access your files anytime you want to see them again later, from a OneDrive PC or other mobile device.
Step 1. Go to Settings> Software Update.
Step 2. Tap Download and Install.
Step 3. Follow the instructions on the screen.

How to link Samsung accounts and Microsoft account through Cloud Sync
To sync your Gallery app with OneDrive, you must first sign in to OneDrive. Even if you don’t have a Microsoft account, you can log into OneDrive with a Samsung account through Cloud Sync. Follow the steps below.
Step 1. Open the Gallery app and then tap Menu (the three horizontal lines) at the bottom.
Step 2. Press the Settings icon.
Step 3. Tap Cloud Sync in the Gallery settings menu.
Step 4. Read the message, accept the permissions, and then tap Connect.
Step 5. Tap Create One! And then create a Microsoft account with your current Samsung account. Continue following the instructions in the application until you complete them.
Note:
- The Cloud Sync menu only appears when you haven’t signed in to OneDrive yet. If you’re already signed in, the Sync with OneDrive menu will be displayed.
- Make sure you are connected to the internet.
How to sync specific albums in the Gallery app
You can sync and save certain important albums to OneDrive, such as family vacation photos and selfies with your best friends. Start from the Gallery settings menu and follow the steps below.
Step 1. Tap Sync with OneDrive.
Step 2. Tap Albums to sync.
Step 3. You choose which albums will sync to OneDrive by tapping the switch next to the album.
How to download files from OneDrive
OneDrive allows you to download the photos and videos that you have synced through OneDrive from another phone, tablet, or PC.
Step 1. Open the OneDrive app and then tap the Photos tab.
Step 2. Touch the photo or video you want to download to your phone.
Step 3. Tap the Download button.
Step 4. Touch SAVE again to confirm. If you want to save to a different location, tap the Back arrow icon to choose a different location for your files, such as Documents or Pictures.
How to restore deleted files from OneDrive
It’s no big deal if you accidentally delete photos from OneDrive. Deleted photos and videos are not permanently deleted immediately. They are kept in the recycle bin for a few days, so you can restore your files from there.
You can find the deleted files in the OneDrive app> Me> Recycle Bin.
How to sync Gallery photos and videos to OneDrive automatically
The automatic sync feature for the Gallery app may be disabled by default, but you can easily turn it on so that all your photos and videos sync with OneDrive. If you already have a OneDrive account, follow the steps below.
Step 1. Open the Gallery app and then tap Menu (the three horizontal lines) at the bottom.
Step 2. Press the Settings icon.
Step 3. Tap the switch to activate syncing with OneDrive. Your photos and videos in Gallery will sync to OneDrive automatically.
Note: Screenshots and device menus may vary depending on the device model and software
version.
How to update Play Store and Galaxy Store apps on your Galaxy phone
As we all know that Galaxy phone comes with Google Play Store and Galaxy Store, where you can download ample apps. Wher you can choose to update your apps automatically or manually. Updating apps is very essential as it gives you access to the latest features and improves app security and stability. Follow this guide below to keep your apps up to date.

I would recommend that, before proceeding with the below steps, be sure that all devices’ software and related apps are updated to their latest version.
Now to update your mobile device’s software, follow these steps:
Step 1. Go to Settings > Software update.
Step 2. Tap on Download and install.
Step 3. Follow the on-screen instructions.
Update apps from the Play Store
It is recommended that always keep your apps up to date, it’s a way to maximize their performance. Follow the steps below to update apps individually or all at once using the Google Play Store app.
Step 1. Launch the Google Play Store app, and then tap the Profile icon at the top right.
Step 2. Select Manage apps & devices.
Step 3. You can check the number of apps available to update.
Tap Update all to run the updates all at once.
Step 4. If you want to update apps individually, tap See details and then tap the Update button next to the app you would like to update.
Note:
- When some apps are updated, they may require new permissions. You may get a notification prompting you to accept the new permissions.
- After updating your app, you may need to restart your phone.
- If you want to search for a specific app, tap Manage app & devices, then tap Manage. If an update for the app is available, an Update button will appear on the app’s Details page.
Turn on Auto-update apps in the Play Store
Enable Auto-update to automatically update apps downloaded from the Play Store. Updates are installed automatically by the Play Store, so you can always keep your apps up to date without having to do it yourself. Follow the steps below to use the Auto-Update feature.
Step 1. Launch the Google Play Store app, and then tap the Profile icon at the top right.
Step 2. Select Settings.
Step 3. Select Network Preferences, and then tap Auto-update apps.
Step 4. Select your desired setting, and then tap Done.
Choose Over any network to update apps using either Wi-Fi or mobile data.
Choose Over Wi-Fi only to update apps only when connected to Wi-Fi.
Note:
- If an account on your phone has a sign-in error, apps may not update automatically.
Update apps from the Galaxy Store
For Galaxy devices, the Galaxy store is the place to download and update the dedicated apps. And these apps should be updated separately from apps downloaded from the Play Store. Follow the steps below to update Galaxy Store apps.
Step 1. Launch the Galaxy Store app, and then tap the Menu icon (the three horizontal lines) at the bottom right.
Step 2. Tap Updates.
Step 3. You can either tap the circular arrow next to individual apps to update one at a time or tap Update all to install all available updates.
Turn on automatic updates from the Galaxy Store
Apps downloaded from the Galaxy Store also have an auto-update feature to automatically keep them up to date. Follow the steps below to turn on automatic updates in the Galaxy Store.
Step 1. Launch the Galaxy Store app, and then tap the Menu icon (the three horizontal lines) at the bottom right.
Step 2. Tap the Settings icon at the top right.
Step 3. Tap Auto-update apps.
Step 4. Select your desired setting.
Uninstall app updates
If you want to restore the previous version of your app then you can uninstall updates to revert it to its previous version.
Step 1. Launch the Settings app, and then select Apps.
Step 2. Find and tap the app you want to revert.
Step 3. Tap More options (the three horizontal dots) at the upper right corner.
Step 4. Tap Uninstall updates.
Note:
- Device screenshots and menus may vary depending on the device model and software version.
How to know that my mobile device is compatible with Disney Plus?
Disney + is the Walt Disney company’s streaming platform, and now you can also avail of this platform on Samsung mobile devices that include both Smartphones as well as Tablets. This opens the gateway to a world of adventure, action and memories.
All users from countries such as Brazil, Mexico, Panama, Chile, Peru and Argentina can now download the application and enjoy all the classics of Disney, Pixar, Marvel, Star Wars and National Geographic, starting from films and documentaries to original series.
This association will give users an endless experience of the world of Disney, here credit goes to the compatibility of the mobile devices which gives access to the user with the Disney+ application. The Streaming application is now available on the Play Store to make all users can easily download it.
To download the Disney+ application, the minimum compatibility required are:
– Android 5.0 (Lollipop) operating system or later.
– 17 MB available in device memory.
Note: Downloads made in the application will take up additional memory.
How can I download the Disney + app?
Now to download the Disney+, follow the following steps:
Enter the Play Store > In the search engine enter Disney + or Disney Plus > Press Install.
Note: To have access to the content of the application you must pay the subscription.
If problem accessing the application, the Steps to resolve
The first and foremost thing to do is to delete the application and install it again.
To remove it, hold down the application until an options menu appears where to uninstall option will appear.
You can also go to Settings > Applications > Find and select the desired application > Uninstall.
What should I do when an application closes automatically as soon as I start it?
Samsung is always a step ahead when it comes to leading innovations and updates and is aware of this phenomenon that may appear on Galaxy devices due to the Google Webview issue.
For the one, who is not aware: What is Google WebView for?
Android WebView is a system component for the Android operating system (OS) that allows Android apps to display content from the web directly inside an application.
The Webview issue has already been resolved with the latest Android System Webview and Chrome app updates version 89.0.4389.105. So please update these apps to the latest version by following the steps.
Android System Webview
This method solves the problem of crashing or closing Android apps. Follow the step-by-step instructions below to update the app.
Step 1. Go to Settings and select Apps.
Step 2. From the list of apps that appears, select Android System WebView.
Step 3. Tap App Details. in store > Update.
Chrome
Go through the following steps given below:
Step 1. Go to Settings and select Apps.
Step 2. From the list of apps that appears, select Chrome.
Step 3. Tap App Details. in store > Update.
Note: If the Update menu is not available, tap the Enable button to activate the app update.
Steps to use the Calendar app on a Samsung smartphone
As we all know the importance of systematic planning and scheduling the events prior which leads to success as you’re able to use your time wisely. To know how to use the Calendar app efficiently and schedule the events in a very simple way, as it contains a variety of ways to maintain your diary to stay up to date on your routine.
I would recommend that, before proceeding with the below steps, be sure that all devices’ software and related apps are updated to their latest version.
Step 1. Go to Settings > Software update.
Step 2. Tap on Download and install.
Step 3. Follow the on-screen instructions.
Basic navigation of the Calendar app
Now before you start using Calendar, it is better that you understand the meaning of the icons to learn how to use them more easily.
1. Menu: Tap here for more options.
2. Date Select: Tap here to quickly change the date, month and year to jump to a specific date.
3. Drawing mode: This option is only available while looking at the monthly view on specific devices that have an S pen. Use drawing mode to doodle on your calendar just like if it were hung on the wall.
4. Today: This button will quickly take you to the current date.
5. Events: You can see the title of your events on the calendar itself. Tap an event to expand it.
6. Selection box: The outline around a date shows you the date you have selected. When you open the calendar, it will automatically select the current date.
7. Current date: The current date will be highlighted to make it easier to see.
8. Add event: Tap this button to create an event. The date of the event will be automatically entered as whichever day is currently selected with the selection box.
- Swipe left or right: Swipe left or right to switch the month that you are currently looking at.
- Swipe up: Swipe up one or two times to see more information about the date that you have selected.
Getting started with calendar settings
How to change your settings for the calendar
Step 1. Open the Calendar app and tap Menu (three horizontal lines).
Step 2. Tap on a Settings icon.
- First day of the week: Of the 7 days of the week, you can set the day you want as the first day of the week.
- Alternate calendar: Samsung Calendar offers a total of five alternative calendars. These are Korean lunar, Chinese lunar, Vietnamese lunar, Hijri, and Shamsi.
- Show week numbers: This setting allows you to add a number to your calendar that tells you the number of weeks.
- Hide declined event: You can hide the schedules you denied.
- Highlight short events: You can highlight events in a short time.
How to create an event
Step 1. Open the Calendar app, and then click the date you want to add the schedule.
Step 2. Tap on the + icon > change the Title of the event.
Step 3. If you want to note the duration of the event, set the Start and End date and time.
Step 4. If necessary, you may enter Location and Alert types and settings (methods/timing/multiple alarm/repetition) and then Save the event.
How to delete or edit an event
The steps are as follows:
Step 1. Tap the date of an event you want to delete or edit > Tap and hold the event.
Step 2. Tap Delete or Edit to edit the event in detail.
How to link external accounts added to Syncing Calendar
The steps are as follows:
Step 1. Open the Calendar app and tap Menu (three horizontal lines).
Step 2. Select an email and tap on the accounts
Step 3. Tap on Sync now.
How to share Calendar
Step 1. Click on the date you want to share with > Tap and hold on to the event.
Step 2. Tap Share > choose Share as Calendar file or text.
Step 3. Tap on the app.
Note: Device screenshots and menu may vary depending on the device model and software version.
How to protect your Galaxy phone from installing smishing, pharming, and spy apps
Though all Galaxy apps are being scanned before they are downloaded to your phone, therefore your phone is unlikely to be affected by any sort of virus. Still, sneaky advertising messages or emails can try to download harmful software or malware to your phone. There are several things you can do to protect your Galaxy phone from these kinds of smishing, mobile pharming, spy apps, and viruses. Check the guide below.
I would recommend that, before proceeding with the below steps, be sure that all devices’ software and related apps are updated to their latest version.
Step 1. Go to Settings > Software update.
Step 2. Tap on Download and install.
Step 3. Follow the on-screen instructions.
Precautions to prevent smishing
- Smishing is an electronic financial fraud method that sends a text message including a website address to the user and installs malicious code when the user accesses the website and steals the user’s personal information. Through this, users may suffer damages such as micropayments. So to prevent damage caused by smishing, you should follow the following precautions below:
- Be wary of website links in text messages from unknown sources. (If a text message from someone you know contains a website link, check it before accessing it as well.)
- Install two or more antivirus programs on the product, update to the latest version, and maintain real-time monitoring.
- Apply for micropayment blocking and restrictions.
- Strengthen the product’s security settings by preventing the installation of applications from unknown sources on the product.
Precautions to prevent mobile pharming
Mobile pharming is an electronic financial fraud method in which a fake Internet banking application is installed on a product infected with a malicious application to induce users to enter financial information and then steal financial information. To prevent damage caused by mobile pharming, follow the precautions below.
- Be wary of website links in text messages from unknown sources. (Even in the case of a text message from someone you know, if it contains a website link, check it before accessing as well.)
- Use OTP (One Time Password), security token (password copy protection), etc., and use electronic financial fraud prevention service.
- Install two or more antivirus programs on the product, update to the latest version, and maintain real-time monitoring.
- Never enter your full security card number in your banking application.
- Do not store security card photos in the product.
- When pharming is suspected, promptly request payment suspension through the police or financial institution call centre.
Precautions to prevent spy apps
A spy app is a smartphone application that can collect phone calls, text messages, and location information from product users in real-time, wiretapping through voice recording, data deletion, and even restricting access. To prevent damage caused by spy apps, you should follow the precautions below.
- Be wary of website links in text messages from unknown sources. (If a text message is sent by someone you know and contains a website link, check it before accessing it as well.)
- Install two or more antivirus programs on the product, update to the latest version, and maintain real-time monitoring.
- Use and regularly change security lock settings such as patterns, passwords, and fingerprints.
- Do not allow users to arbitrarily modify registry settings or operating system software.
- Prevent automatic installation of malicious spy apps by setting the product to not install applications from unknown sources.
Precautions to prevent viruses
To prevent damage caused by a virus infection, follow the safety precautions below. Failure to observe the following may result in voiding the product warranty.
- Avoid downloading suspicious applications.
- Avoid visiting untrusted sites.
- Delete messages and mail from unknown or suspicious senders.
- Use the password setting function and change your password regularly.
- Turn on the wireless interface such as Bluetooth function only when in use.
- If abnormal symptoms persist, check for malicious code infection.
- Check downloaded files for viruses before using.
- Install an antivirus program on your computer and regularly scan for viruses.
- Do not arbitrarily change the structure of the product platform.
- Always update the operating system and antivirus program to the latest version.
Note: Device screenshots and menu may vary depending on the device model and software version.
Steps to use the TalkBack feature
As a series of innovations, Samsung has come up with the TalkBack feature that assists visually impaired or low vision people. It provides voice feedback so you can use your phone or tablet without looking at the screen. The function names vary depending on the software version, but the functions are the same.
Now check the guide below to enable or disable the TalkBack feature on your phone.
I would recommend that, before proceeding with the below steps, be sure that all devices’ software and related apps are updated to their latest version.
Step 1. Go to Settings > Software update.
Step 2. Tap on Download and install.
Step 3. Follow the on-screen instructions.
How to activate or deactivate TalkBackClick to Collapse
The TalkBack feature provides voice feedback so you can use your phone without looking at the screen. It is designed for users or situations where it is difficult to see the screen. Follow the steps below to enable the TalkBack feature.
Step 1. Launch the Settings app, and then select Accessibility.
Step 2. Tap TalkBack.
Step 3. Tap the switch to activate TalkBack.
To deactivate TalkBack, tap the switch and tap anywhere on the screen twice quickly.
Note:
- Some features are not available while you are using TalkBack.
- On devices with One UI 3.1, it’s called TalkBack; however, on devices with earlier software versions, this feature is called Voice Assistant or Screen reader.
How to use TalkBack
When you enable TalkBack, your phone will initiate voice feedback and you will automatically be taken to a tutorial on how to use TalkBack.
- Tap the selected item once to read the text on the screen aloud, and double-tap the item to activate the feature.
- Drag with two fingers to scroll.
- If you enable the TalkBack shortcut, you can turn the feature on and off by pressing the volume up/down keys at the same time.
Configuring settings for TalkBack
Configure settings for TalkBack for your convenience are given below:
- New features in TalkBack: Check for key updates and changes to TalkBack.
- Text-to-speech settings: Change the settings for text-to-speech features used when TalkBack is activated, such as languages, speed, and more.
- Verbosity: Customize the detailed settings for voice feedback.
- Speak passwords: Set the device to read the characters aloud when you enter your password. If you deactivate this feature, the device will only read the password aloud when you are using earphones.
- Sound and vibration: Change sound settings for TalkBack.
- Customize gestures: View various finger gestures to control the screen while you are using
- TalkBack and customize the settings for gestures.
- Customize menus: Select which TalkBack menus and reading menus to use.
- Braille keyboard: Easily enter letters and numbers on the screen using a 6-dot braille keyboard.
- Tutorial and help: Learn how to use TalkBack.
- Advanced settings: Configure advanced settings for TalkBack.
- Open TalkBack in the Galaxy Store: Launch TalkBack from the Galaxy Store and check for updates.
Note: Device screenshots and menu may vary depending on the device model and software version.
I cannot get 100GB of bonus storage through the OneDrive app
If someone doesn’t get 100GB of bonus storage through the OneDrive app. So for the knowledge of such users, would like to inform you that: From 25th July 2019, Samsung no longer provides new customers with the 100GB offer on Samsung devices where the OneDrive app is preinstalled. And this decision is part of the company’s internal policy.
Again, to enhance the functionality for our users, Samsung is committed to providing the best possible mobile experience to customers.
Picture resolution taken built-in Instagram mode on the camera is low and fixed
Those who are not aware of the New ‘Instagram mode’ on Samsung Galaxy S10 that allows users to directly upload pictures from the camera app to their Instagram story.
Based on the internal policy of Instagram, the high-resolution photo is automatically compressed to a limited resolution(2020×1080) when you want to upload the picture on your Instagram story. Therefore users cannot select picture resolution using not only built-in Instagram mode on the camera app but also the Instagram app.
What is a secure folder and how to use it?
I would recommend that, before proceeding with the below steps, be sure that all devices’ software and related apps are updated to their latest version. Please check how to update your mobile device’s software in the following order.
Step 1. Go to Settings > Software update.
Step 2. Tap on Download and install.
Step 3. Follow the on-screen instructions.
Things to know: Secure Folder is a separate, secured storage area. The data in the Secure Folder cannot be transferred to other devices via unapproved sharing methods, such as USB or Wi-Fi Direct. Attempting to customize the operating system or modifying software will cause Secure Folder to be automatically locked and inaccessible. Before saving data in a Secure Folder, make sure you back up a copy of the data in another secure location.
Note: To use Secure Folder, you must sign in to your Samsung account.
Setting up Secure Folder
Step 1. Go to Settings > select Biometrics and security.
Step 2. Tap Secure Folder > agree to the terms and conditions of Secure Folder.
Step 3. Enter your Samsung account ID and password and tap Sign in.
Step 4. Select a lock method to use and follow the on-screen instructions to complete the setup. You can also add your biometrics as another way to unlock Secure Folder for convenience.
Step 5. The Secure Folder screen will appear, and the Secure Folder app icon will be added to the Apps screen.
Note: When you launch the Secure Folder app, you must unlock the app using your preset lock method.
Resetting forgotten PIN
To forgot the password is very common in today’s life as everybody has many things to remember which is not easy to remember, so if you forget your Secure Folder unlock code, you can reset it using your Samsung account, and the steps are as follows:
Step 1. Go to Settings > Biometrics and security > tap Secure Folder.
Step 2. Tap the Forgot PIN button at the bottom of the locked screen and tap Reset.
Step 3. Enter your Samsung account password.
Step 4. Choose another unlock code or pattern and tap Continue.
Setting auto lock for Secure Folder
Set the device to automatically lock Secure Folder when it is not being used.
Step 1. Go to Settings > Biometrics and security > Secure Folder.
Step 2. Tap Auto lock Secure Folder.
Step 3. Select a lock option.
To manually lock your Secure Folder, tap More options (three vertical dots) and then tap Lock and exit.
Moving content to Secure Folder
To Move the content, such as photos and videos, to Secure Folder. Follow the steps below to move an image from the default storage to Secure Folder.
Step 1. Go to Secure Folder > tap Add files.
Step 2. Tap Images, select images to move, and then tap Done.
Step 3. Tap Move. The selected items will be deleted from the original folder and moved to Secure Folder. To copy items, tap Copy.
Note: The method for moving content may vary depending on the content type.
Moving content from Secure Folder
Move content from Secure Folder to the corresponding app in the default storage. Follow the steps below to move an image from Secure Folder to the default storage.
Step 1. Go to Secure Folder and tap Gallery.
Step 2. Select an image and tap More options (three vertical dots) and then tap Move out of Secure Folder. The selected items will be moved to Gallery in the default storage.
Adding apps
Add an app to use in the Secure Folder.
Step 1. Go to Secure Folder > tap Add apps.
Step 2. Select one or more apps installed on the device and tap Add. To install apps from Play Store or Galaxy Store, tap Download from Play Store or Download from Galaxy Store.
Adding accounts
Add your Samsung and Google accounts, or other accounts, to sync with the apps in Secure Folder.
Step 1. Go to Secure Folder > tap More options (three vertical dots).
Step 2. Tap Settings > Accounts > Add account.
Step 3. Select an account service.
Step 4. Follow the on-screen instructions to complete the account setup.
Hiding Secure Folder
You can hide the Secure Folder shortcut from the Apps screen.
Step 1. Go to Secure Folder > tap More options (three vertical dots).
Step 2. Tap Settings > switch off the Show icon on the Apps screen to deactivate it.
Alternatively, swipe down the Quick panel, and then tap Secure Folder to deactivate the feature.
Backing up and restoring Secure Folder
Back up content and apps in Secure Folder to Samsung Cloud using your Samsung account and restore them later.
Backing up data
Step 1. Go to Secure Folder > tap More options (three vertical dots).
Step 2. Tap Settings, and then tap Backup and restore.
Step 3. Tap Add account and follow the on-screen instructions to complete signing into your Samsung account.
Step 4. Tap Back up Secure Folder data.
Step 5. Select items you want to back up and tap Back up. Data will be backed up to Samsung Cloud.
Restoring data
Step 1. Go to Secure Folder > tap More options (three vertical dots).
Step 2. Tap Settings, and then tap Backup and restore > tap Restore.
Step 3. Select a device to restore the data.
Step 4. Select items you want to restore, and tap Restore. Backed-up data will be restored to your device.
Uninstalling Secure Folder
You can uninstall Secure Folder, including the content and apps in it.
Step 1. Go to Secure Folder > tap More options (three vertical dots).
Step 2. Tap Settings > More settings > Uninstall.
To back up content before uninstalling Secure Folder, check to Move media files out of Secure Folder and tap Uninstall.
Note: Available settings and screens may vary by the wireless service provider, software version, and device.
Why do apps close unexpectedly?
Samsung is always a step ahead when it comes to leading innovations and updates and is aware of this phenomenon that may appear on Galaxy devices due to the Google Webview issue.
For the one, who is not aware: What is Google WebView for?
Android WebView is a system component for the Android operating system (OS) that allows Android apps to display content from the web directly inside an application.
The Webview issue has already been resolved with the latest Android System Webview and Chrome app updates version 89.0.4389.105. So please update these apps to the latest version by following the steps.
Steps to update the applications to the latest version:
This method solves the problem of closing the applications in use. Now follow the followed instructions listed below to update the application.
-Android system webview:
- Tap on settings and Go to applications.
- Now click on Android System Webview.
- Once the application is selected, go to the App Details option in the store.
- Update the application.
Android System Webview Beta
If Android System Webview Beta was installed on your device, you have to manually uninstall the Beta app updates with the following steps.
– Uninstall Webview Beta updates: Settings > Applications > Search Webview > Android System Webview Beta tab > Tap more (three vertical dots) > Uninstall updates
And then update the official Webview application to the latest version.
-Chrome:
- Enter settings and select applications.
- In the list of apps, look for Chrome.
- Once the app is selected, go to App Details in the store.
- Update the app.
Note: If the Update menu is not available, tap the Enable button to activate the application update.
Steps to fix apps that keep crashing and freezing
Certainly, it is very annoying when you are using your favourite app and it suddenly stops and you are directed back to the home screen. This often occurs when your Wi-Fi or cellular data is slow or unstable, and apps tend to malfunction. Also, another reason for the Android app’s crashing problem is the lack of storage space on your device. This occurs when you overload your device’s internal memory with heavy apps as well.
I would recommend that, before proceeding with the below steps, be sure that all devices’ software and related apps are updated to their latest version. Please check how to update your mobile device’s software in the following order.
Step 1. Go to Settings > Software update.
Step 2. Tap on Download and install.
Step 3. Follow the on-screen instructions.
Optimize internet connection
An app crashing occurs when your internet connection is slow or unstable. In this case, optimizing your network’s strength usually works. If the problem persists, try the below steps in order.
Step 1. Switch off your mobile data/Wi-Fi router for about a few minutes.
Step 2. Turn off your device and restart it again.
Step 3. Switch on mobile data or turn on the router and connect to Wi-Fi.
Step 4. Try using another network connection if the App still crashes and does not run.
If the problem still persists, you may change the settings to solve the problem as suggested below.
Setting 1. Clear App data and cache
This method resolves the Android Apps crashing issue by wiping off unnecessary App data stored in your device. Follow the step-by-step instructions given below to clear unwanted App data and cache.
Step 1. Go to Settings and select Apps.
Step 2. From the list of Apps that appears, select an issued app.
Step 3. Tap Storage > Clear data or Clear cache.
Setting 2. Free up space for on-device storage
Running out of storage space on your Android device is very common because we end up saving numerous files, which occupy a lot of the device’s memory. You may delete data such as rarely used apps and unnecessary documents to create space in the device’s internal memory for important apps to function smoothly.
To check:
Step 1. Go to Settings > Apps.
Step 2. Tap on More options (three vertical dots) in the upper right corner > Sort by > Size.
To delete:
Step 1. Go to Settings > Apps.
Step 2. Select an issued app.
Step 3. Tap Uninstall to free up storage space.
Setting 3. Reinstall the App
Improper App installation may also cause Android Apps crashing problem. You must download the App from the Google Play Store and use it only after it is successfully and completely installed on your device. In case your Apps stop abruptly, delete or uninstall the App from your device and install it back carefully after a few minutes.
Step 1. To uninstall apps on an Android device, go to Settings > Apps.
Step 2. Select an issued app > tap on Uninstall.
Step 3. Go to Google Play Store and reinstall the App again.
Setting 4. Factory reset the device
Factory resetting your Android device must be your last resort because it deletes all data and device settings. We strongly recommend backing up all your important data prior to a Factory data reset. Follow the steps given below to factory reset your device while it is switched on.
Step 1. Go to Settings > Swipe to and tap on General management.
Step 2. Tap on Reset > Factory data reset.
Note:
- Be sure that this will erase all data, including files and downloaded apps.
- Device screenshots and menu may vary depending on the device model and software version.
How to remove lock screen ads
As Samsung does not put advertisements on your home or lock screen. And maybe Ads are from previously downloaded apps in common. Sometimes, you see ads on your lock screen when you are not even using your mobile. There are some ways to get around to these advertisements by trying out the below methods.
Also, before proceeding with the below steps, be sure that all devices’ software and related apps are updated to their latest version. Kindly follow the below steps to update your mobile device’s software.
Step 1. Go to Settings > Software update.
Step 2. Tap on Download and install.
Step 3. Follow the on-screen instructions.
Recently downloaded apps can cause the ads
If you have started seeing these ads on your Android lock screen only recently, chances are a newly downloaded app is responsible for the doubtful act. You can easily check recently activated apps and uninstall them using the Play Store.
Step 1. Go to Google Play Store.
Step 2. Tap on Menu > My apps & games.
Step 3. Tap on Installed > sort by Last Used.
Step 4. Among the most recently used apps, select an issued app and tap Uninstall to get rid of the application.
Note: Flashlight, battery optimization, or weather apps tend to cause advertisements on the lock screen. Try to delete these types of apps first and see if the problem persists on your mobile device.
Option 1. To avoid potentially unwanted ads
Android viruses are not that uncommon, especially when it comes to careless installation of programs from unknown sources. To avoid unwanted programs and Android malware, make sure you download apps from reputable sources. Other tips from experts include:
- Check for app permissions: never allow the application to gain administrator’s rights.
- Read online reviews: not those on the official sources, as hackers might place fake reviews.
- Make sure your Android is updated with the latest security patches.
- Avoid apps from unknown publishers.
Option 2. Report inappropriate ads to Google
Google Play Policy clearly states that the app must not contain fraudulent ads or ads that cause discomfort. Ads can only appear inside of the app being served. In general, ads served within the app are considered part of the app. Therefore, ads displayed in the app must comply with all Google policies.
In case you have identified the app with inappropriate ads, you can report it to the Play Store if you suspect it is in violation of the Play Store terms and services.
Step 1. Go to the install page for the app in Google Play Store.
Step 2. Tap on More options (three vertical dots) > Tap Flag as inappropriate.
Note: Device screenshots and menu vary depending on the device model and software version.
How to troubleshoot Google Play Store download
Not being able to download an app from the Google Play Store or it shows some random error message? This is probably the most common problem faced by Android users getting stuck with the ‘downloading’ or ‘pending’ message. Yet not to worry, here are a few methods to how easily you can resolve such issues related to the Google Play Store.


Also, before proceeding with the below steps, be sure that all devices’ software and related apps are updated to their latest version. Kindly follow the below steps to update your mobile device’s software.
Step 1. Go to Settings > Software update.
Step 2. Tap on Download and install.
Step 3. Follow the on-screen instructions.
After the software update, check your internet connectivity as well and follow the below steps:
First, check your internet connectivity
Most of the time, Google Play Store errors are caused by intermittent or slow internet. If you are on mobile data, try to connect the device to a strong Wi-Fi network. If Google Play Store is not downloading while you are connected to Wi-Fi, you may need to troubleshoot your Wi-Fi first. The general rule is to ensure that your phone has a stable internet connection before you start to download anything from the Play Store app.
How to check the Internet connectivity
If you are connected within a Wi-Fi network, you may find Wi-Fi status on the bar whether it has strong or weak internet connectivity. If you are using your mobile data, you will need to ensure that you have enabled mobile data via your Quick panel. Follow the steps below to check your mobile data available.
Step 1. Swipe down from the top screen to access your Quick panel.
Step 2. Turn Mobile data on.
Note: Google Play Store downloads only one app at a time. If another app is being installed or updated, wait for it to finish or stop.
Setting 1. Check enough space in your storage
If there is insufficient storage space, downloading won’t work. Check the storage space as shown below.
Step 1. Go to Setting > select Device care.
Step 2. Navigate to and select Storage > tap on Advanced at the bottom of the screen.
Step 3. Check Available space.
If your device has less than 1GB of storage available, you will need to free up some space. For example, you can back up your pictures and videos on the cloud and then delete them, or you can delete unwanted apps for more space.
Setting 2. Clear data and cache of Google Play Store
Deleting data and cache can help your Google Play Store fix the downloading problem. You may follow the below steps to clear the data and cache.
Step 1. Go to Settings and select Apps.
Step 2. From the list of Apps that appears, select Google Play Store.
Step 3. Tap Storage > Clear data or Clear cache.
Setting 3. Remove and set up the Google account
Try to log in to your Google account by following the steps below.
Step 1. Go to Settings > Account and backup.
Step 2. Tap Accounts > Google account.
Step 3. Tap on Remove account.
Step 4. Add account > Log in to Google with Google account and password.
Setting 4. Restart the device
You can restart the device by choosing either method below.
Method 1. Press and hold the Power button> Tap on Restart on the pop-up menus.
Method 2. Swipe down and slide the menus and press the Power button > Tap on Restart on the pop-up menus.
If you are an S20 user, you can power off by ‘Press and hold’ the side key and the Volume-down key together.
Note: Device screenshots and menu vary depending on the device model and software version.
How to use the Samsung Members app
There are a lot of advantages to using a Samsung Members app, the benefits include Expert support, community connection and exclusive perks. Apart from this, what is more, important is expert advice or the right solution to the problem from the people who know it.
Also, before proceeding with the below steps, be sure that all devices’ software and related apps are updated to their latest version. Kindly follow the below steps to update your mobile device’s software.
Step 1. Go to Settings > Software update.
Step 2. Tap on Download and install.
Step 3. Follow the on-screen instructions.
Explore Samsung Members
Samsung Members Community provides an enriching way to explore more, here you can connect and share with others. Share tips and reviews, of your brilliant solutions with other Galaxy users in the Community. It’s a peer-led space like you.
You can easily get insider news and info from experts through News and tips. You can also get tips and tricks to use your technology to its fullest potential.
You may also get the most out of special offers from Samsung Benefits as well. Access exclusive perks for the things you love and places you go.
Note: Some menus may not be available depending on the country.
How to get help from Samsung Members
Please contact Samsung Members for any errors or inquiries while using Samsung products and services. You can also find frequently asked questions. Each function is provided when selecting Explore and Get help tabs.
Phone care
keep your Galaxy at its best. You can easily perform diagnostics to check the condition of your device.
- Automatic checks
- Interactive checks
- Clean memory
- Optimize settings
FAQs
Get the answers you need. A comprehensive FAQ section is ready with the answers you were looking for. You can also ask Samsung expert advisers directly for more in-depth responses or send reports on issues such as apps crashing.
Feedback
Ask questions to our experts or send error reports directly from your device.
Note: Suggestions may not be available depending on the country.
How to submit an error report
With the Samsung Members application, you can submit an error report for troubleshooting your device. You can submit a report on issues such as slow devices, overheating, system/settings, and much more. View below the steps on how to submit an error report.
Step 1. Open the Samsung Members app, and then tap the + key at the bottom right.
Step 2. Tap Error reports.
Step 3. A message will populate for you to choose Always to send the system log data or Just this time. We recommend being connected to a Wi-Fi network depending on your mobile network plan.
Step 4. You will be able to choose from a Category on what issue your device might be experiencing among the list.
Step 5. Please enter issue details or attach a video or screenshot to make it easier to understand. Then press Send icons to complete the report.
How to report errors using the Galaxy Wearable application
In the case of a wearable device, it is possible to send error reports by accessing the Galaxy Wearable app instead of direct access to the Samsung Members app.
Step 1. Launch Galaxy Wearable app > tap Menu (three horizontal lines) on the left-top side.
Step 2. Tap Contact us > tap Error reports.
Step 3. Select Always or Just the time and then tap OK.
Step 4. Describe the problem in detail and SEND.
Note: Device screenshots and menu may vary depending on the device model and software version.